Saturday, December 24, 2016

Princess-Seamed Little Black Dress


 This is one of these pieces that make a wardrobe. Lately, I try to pick well my projects, with good patterns and made with noble fabrics, slowly and throughout. This is one of those.
I loved the Mary Quant dress in the cover of this book:


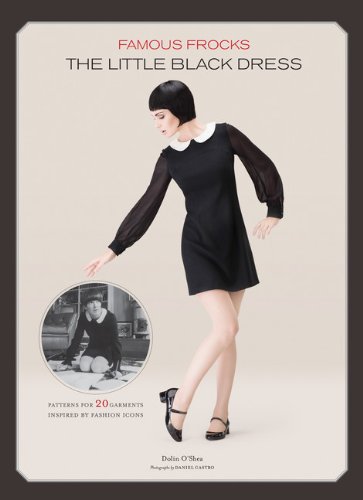
but I did not like the pattern, with a yoke in front to make the bust shaping. I preferred it with princess seams shaping the bust, waist and evasée skirt. Also in the book, we can find the Diana dress:

...with its princess seams. I had to play a little bit around both patterns to mix them properly and add some of the features I wanted the dress to have. These modifications were made first on paper.
Into the Diana four pieces (centre front and back, sides front and back), I made the Mary's armscyes, which had to accommodate the Mary's sleeves, and also the Mary's neck, which round shape I preferred to the boat shape in the Diana's.


I put the modified pattern pieces on the dress form, and it was obvious that they were good on the bust area, but too roomy in the waist, where the Diana dress is not precisely tight. Also, it lacked any flare at the skirt. To be sure about this, I decided to make a toile, modify it and use it as pattern (and for safe-keeping). But if we make sure that the pattern is big enough (and we are in a hurry, as it was the case), we can make the alterations in the real fabric.
I decided to leave the front and back central pieces intact and shape the waist in the side pieces.

After "all day at school", with Christmas lunch included.

I had first to remove all the 1.6cm around every pattern piece, because I do not work with included seam allowances, of course!
So, I took 2 cm off the waist in the side pieces, and added 3 cm of flare in all of them, starting at the hip area and progressing evenly from there.

I tailor-tacked all the pieces to mark them properly, put the back invisible zipper to start with, and basted all the pieces together to the first real fitting on me. The reason I do not like making toiles, is that they do not have the weight and hand of the real fabric. Only with the real fabric we can decide if it is too tight, etc. That first fitting was a total success, the gorgeous wool crepe I had bought at  Stone Fabrics was hanging beautifully on me, so I started to machine stitch it all.
I finished the seam allowances with a machine zig-zag all around, and pressed them open. I had not stay-stitched the curves of the princess lines at the bust and that was a mistake, as some of them gave under the press, but I could reshape them on the dress form.
Then I proceeded with the sleeves, for which I had bought this wonderful silk chiffon in Stone Fabrics as well. First, I  marked them with tailor tucks, gathered the caps and cuffs' parts, and put the cuffs on, with buttonholes made. I closed the sleeves with French seams, and basted them to the dress. I machine-stitched the underarm part, but hand-stitched the caps, to better absorb the gathers. No machine needle I had was up to the task of sewing chiffon, and it pulled some threads here and there, that I managed to recuperate pulling them back into place.
I self encased the armscyes' hem allowances into themselves, basting them first and hand-sewing them with am inconspicuous slip stitch.
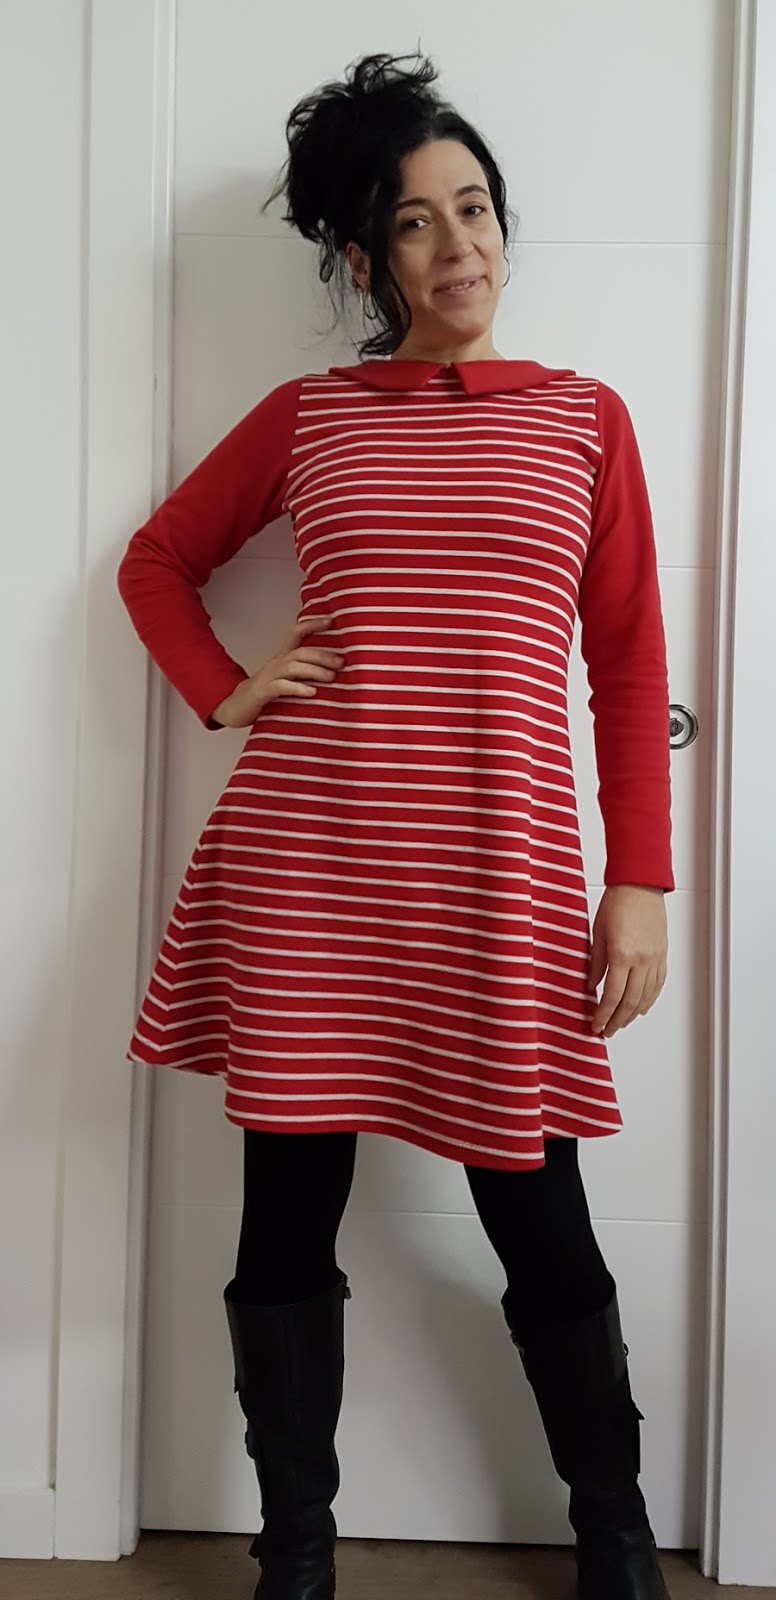
I finished the bottom hem by hand too, no top-stitching for this classic jewel of a dress.
The result is just gorgeous, I love it. It is classic, elegant, comfortable to wear and becoming to my no-waist figure.

I'll keep the modified pattern to replicate it again, I've been wanting a good princess-seamed dress for ages.


Tuesday, December 13, 2016

Red and White Striped Cotton Coco


 This is just another coco-copycat dress. As I explained in my first one, Tilly's design was an inspiration for me to make my own Coco pattern following Aldrich's book instructions.
It is a wonderful design, I must say, specially with a cotton double sided ponte like this.


This dress has to be made in a jersey fabric, since it is a flat design with no darts, but we do not need any extra ellasticity in the fabric, so cotton is alright, specially thik, heavy cotton is excellent here.
I found this fabric in The fabric Godmother, and it is double sided, striped on the one side, and plain red in the other, so I decided to use this at my advantage by making the sleeves and neck in contrasting plain red.

As for the neck, I first put a funnel neck, by my stylist told me to make some collar positioned over the stripes for a better contrast. I used Tilly's Françoise dress collar, adapted over the dressfrom to this dress' neck cut.

I think it is lovely, really sweet to the skin, lively and becoming, I love it!

 Follow my blog with Bloglovin

Monday, December 12, 2016

Leather Jacket Reconstruction


Carlos with his biker jacket in 1999 (Dinamo Open Air Festival). It was too baggy, sleeves too roomy and caps too low.


My love has had this jacket for more than 25 years. It was custom made when he was an adolescent, and he has been complaining about it since.

He never liked its excess of ease and its dropped shoulder seams.We even took it to a leather tailor to ask for a repair, but he told us it was impossible to repair.

Resultado de imagen de ramones
The Ramones made the biker jacket popular in the rock and punk scene in the US.

With time, I've been learning how to work with leather. Read some books, done Don Morin's Craftsy course, and finally I felt ready and up to the task.
Fortunately Carlos has another old leather jacket, also a biker version, that I could use as a model.
I approached the beast by three different areas.

The jacket repaired, narrower body and sleeves, attached at shoulder points.

First, sleeves. I took the sleeve-caps zipper off, and unstitched the lining. I elongated the sleeve length at the bottom and reduced their width along both seams, to the same measure of the model. 

 
When sewing leather, seams have to be hammered open and glued. I restitched the lining, reducing it the same as the sleeve, and finally I stitched the zipper again at the top.

The second area to remodel was the side seams. After some calculation, I reduced both sides to replicate the model. First I had to remove armscyes' zippers, unstitch the lining and the waist piece. After redoing the side seams, stitch it all up again, not without trying it on and fitting it properly.
The final and most complicated problem were the armscyes themselves. For these, no even the model jacket was right, they were also too low. 


Classic leather biker jacket has set in sleeves at shoulder points, so I had to set them way way up. 
The first scye took me five attempts to finally nail it. Zippers were of aid, because I could pin them (not without stabbing myself with needles several times, ouch ouch!!) for fitting. The second scye was a simple replica to the first.
I am very glad with the result. Karlos complains of wrinkles in the wrong places, he says it feels 80% good. Very useful as a fitting person for me (and the BEST boyfriend EVER), he sees even the smallest flaw, but in this case, he is verging on mania. After he wore it this weekend though, he was happier with it, I think we are more than 90% good now!

Saturday, December 3, 2016

Pink and Purple Stripped Wool Knitted Jersey!


I am so proud to present this new knitted jumper!
I am a new knitter, this is only my third project, and although I imagine all projects are special, this is special for me because it means me mastering the technique like a boss!
In the previous jumper, I was learning and struggling till the end. I had to undo many times long and short bits of knitted material, I even accepted many mistakes as part of the project.
 Not in this one.
This is perfect, no flaws, no mistakes. This is me mastering the knitting stitch and the creation of a pattern copying another jumper I had, tight to my body. As in the previous one, I followed the Knitter's Handy Book of Sweaters to replicate a raglan sleeve model. 
 I used the circular needles as the book suggests, so I now have a completely seamless jumper. I think it is the best way to knit a jumper, for the comfort circular needles offer and for the result.

 I took the sleeves with me in my summer travels to Portugal, Czechia and Cadaqués, and knitted in planes (that helps me in my fear to fly a big deal) and trains, beaches and hotels.
I used Katia's 100% merino wool like in the previous one. It's gorgeous to work with and wear. I won't be the last.

As I knitted along, I read Zimmermann's Knitting Without Tears, and I realized Budd's book is indebted to our saint patron of the knitters, Elizabeth Zimmermann, who invented, or at least popularized, the seamless sweaters knitted with circular needles, the technique of closing stitches in the underarm area, among many other things. It is a very interesting book to better understand patterns and freestyling.

The idea and design of the stripes was mine. I made them quite wide, 5 cm, or 16 rows long.
I also included some waist shaping, with decreases and increases that coordinate with the striping (every 8 rows).

I had some tribulations with the neck. The first version was too close and tight, so I undid it all and started anew some cm before. The second version was more becoming but since I simply bound off stitches at the last row, it became too tight too, so I undid it again and finished with a sewn bind off as E. Zimmerman, or Budd recommend.
I recorded all the details of the pattern in Ravely


I still do not master blocking, let us be sincere. I submerge the finished jumper in lukewarm water with some drops of soft soap, rinse and take the excess of water with a towel. Then I put it over a foam mat, with pins stuck marking the shape the original jumper had, and I spent two hours trying to shape it back into there. It is huge after taking it off the towel, and I have to proceed with infinite patience to clap and poke and gently try to absorb the excess into shape. It took a whole day to completely dry, but after so much struggle, the result is perfect. I have been told wool clothes have to be washed only once a year, and also that the piece will keep its blocked shape for 7 or 8 wash-ups, but I think it is going to become huge again next time I wash it. We'll see!


Friday, December 2, 2016

Long-Sleeved Body


When I was in Portugal last summer, I found this wonderful elasticated cotton, perfect for a body to wear under the jumper I was knitting.
I've sewn three or four of these already, it is a must in winter time, specially to wear under wool jumpers. I have sensitive skin, and for me even the softest wool is itchy.
I used my own pattern, like in previous versions. For next renditions of the pattern, I will definitively adjust the crotch area, since it is too long and wide, and I always have to reshape it after fitting.
Other than that, perfect result!

Sunday, October 30, 2016

Man Tracksuit Pants


Good news and bad news.
Bad news is "The man in front of Sainsbury's" is a sham. I was so proud of having met him, he seemed so eager to tell me the truth and nothing but the truth about fabric composition. Well, caught lying the lad. I bought and carried through the air three metres  of this s***t for nothing. He told me it was cotton, double sided, gorgeous. Well, it is not, at least not only cotton. Its blackness glows, it sticks to my iron if too hot and it burns like (to say the least) viscose, or worse, the feared and despised polyester. What a pity! Three metres, 140 cm wide.
Good news is I made a new custom fit pattern: tracksuit of my love.
I used Aldrich's book for menswear, drawing the flat paettern in paper with K's real measures. This is almost necessary in this particular case because he is so tall and thin, the standard sizing is always wide or short. Now this is proportionate, well fitting and becoming. A pattern to keep and use over and over. The man loves his traksuits. And burning them lighting the fireplace... hahaha! So, these will not be the last. I hope.

Wednesday, October 19, 2016

Black Jersey Minishort Copycat

A very simple but necessary kind of project, when I saw these Adidas minishorts on my friend Meri, I had to have them. 
So I borrowed them, and used the rub off technique described in this book, which is proving VERY useful, to copy them. They fitted me like a globe, so I only had to reproduce them exactly. In the final stages of construction I decided to put a couple of elasticated bands at the top insteat of a cord, between the topstitching lines.
For future reproductions, better not to topstitch the top part, only understitch it like in the model, to avoid some ruffling. Nothing serious, since it disappears when wearing them, but it makes the piece to protude slightly off the body.
Other than that, and the fact that this is not 100% cotton (thanks to the man in front of Saintbury's, who lied to me) perfect!

Saturday, September 24, 2016

Cotton Sundress

I bought this wonderful printed cotton in my summer holidays in Lisboa. It is made in Portugal, with a beautiful Japanese pattern, good quality old cotton, only at 9 Euros per metre. Traveling to Lisboa is worth it only for fabric hunting. And food. And Alfama. And weather, beaches, nice people...
When I came back, I decided to replicate another sundress I already have, this time to make it with a lower waist, since the first version is lovely but has this unconfortable problem.
So I used the same pattern than the previous version. The bodice is my pattern, with the waist enlargement modification, and the skirt is a masterpiece I love, by Burda. It is a flared skirt with inverted, unpressed pleats, two in front and two in the back.
I self-encased all the seam allowances in the dress, and topstitched them, since black thread is really invisible in this fabric.
First, I finished the skirt with a waist band, and then I made the bodice, sewing it to the same waistband, which becomes invisible, but works as a stay to the waist when wearing the dress. I had to calculate precisely the waist measure to make it conformtable to wear, not to tight or loose.
I also modified the shoulders, moving them towards the inside, because in the previous version they had a tendency to fall off.
I installed a 70 cm long zipper in the back. Due to the waist sructure, this cannot be sewed as invisible, but as the old lapped zipper thing.
The dress is very confortable to wear, beautiful and becoming, I think. Total success!


Sunday, September 4, 2016

Classic Bodice Bust Dart: My First Draping Project

Every summer I try to learn something new in sewing, and this 2016 draping it was. I bought this massive book:


which is proving to be really impressive and worth it. I have only had time for the first 5 projects, but I can already apply the newly acquired learning to my sewing projects.


The first project is a tunic; which I did wrong, thinking it was whole front and back, when it was only half of each. 


This is a study on breast darts. Much more easier and graphic than the horizontal paper alternative!!
On top of that, I believe new learnings are better acquired  if applied with a real purpose, so I plan to use the projects the book presents to me as real sewing projects whenever possible. And this presented as a wonderful possibility. I had some remaining fabric from my last dress. It is a wonderful cotton Liberty print fabric, not to be disregarded, and it was perfect for the Classic Bodice Bust Dart project:


 The book gives you graffic ideas of how to transfer the studies to actual clothes. This was a blouse with a bust dart, no waist shaping and a bias neck-bow piece.


This is the pattern as I made it over my dress form. I invented the armscyes and the neck-cut, but in fact I pretty much followed the book suggestions.


And this is the result. With a deep-blue background, it is screaming for some jeans to go with, poor thing.

When I was draping my pattern, I put a little on at the waist. To be able to visualize that and do it there! is great. I love that!

 
This is a blouse to put in your suitcase for holidays in warm places. Really wearable.


The fabric was so scarce, I had to attach different pieces to make the bias neck tie.

I will go on practicing... maybe not so much in winter (I must work and study, so less hobby time), but the projects are candy for my eyes, really. Great book, it seems!